Often times when I tell people that I sew or quilt, they say “I just don’t have enough patience for sewing” and I think I often forget that it really does require some patience. Sometimes, you can work on a project and everything goes smoothly and it’s great – one neat thing about sewing is how quickly you get to see results. It doesn’t take a lot of sewing before you start to see your project coming together.
Then there are those times where something isn’t working on your machine and it takes a while to troubleshoot it – that can be very frustrating if you aren’t a sewing machine repair expert (I’m not!). It’s like the times that my quilting machine and I fight – I’ve tried so many different solutions without any consistent answer and the biggest frustration is that I feel like I still don’t know the root cause of the issue and you can’t fix the problem if you don’t know what truly caused it. Times like that require patience.
Then there are those times where something isn’t working on your machine and it takes a while to troubleshoot it – that can be very frustrating if you aren’t a sewing machine repair expert (I’m not!). It’s like the times that my quilting machine and I fight – I’ve tried so many different solutions without any consistent answer and the biggest frustration is that I feel like I still don’t know the root cause of the issue and you can’t fix the problem if you don’t know what truly caused it. Times like that require patience.
Then there are times when you are trying to make something based off of a pattern or tutorial that is unclear. You read the instructions over and over and you just can’t figure out what exactly they are trying to get you to do…times like that require patience.
Then there are times when you decide to just “wing it” but either you aren’t careful enough or forgot about something and it doesn’t come out right so you have to rip it all out or sometimes even just scrap it and start over…times like that require patience.
So I guess sewing requires more patience than I realized, it’s just that most of the time, sewing and finishing projects is so fun that I tend to forget about the times I had to be really patient. Well, my last project was a real exercise of patience…Some of you may remember my post about a lifejacket bag I was going to make for Ryan, here’s how it turned out:
Original Requirements
When Ryan first asked me to make a bag for him, he just said he wanted to fit all the life jackets in the bag and he wanted it to have handles to easily pick up the bag and move it in or out of the boat. So I went out on the deck, stacked up all the lifejackets I could find, measured the stack-up and then added a few inches in case he had another lifejacket or two that needed to go in there. I happened to find some canvas at Goodwill that was large enough to make the bag I had planned so all I had to get at JoAnn fabrics was a plastic zipper and some webbing for the handles.
I cut all the pieces for the fabric and then I was worried about the edges fraying but I didn’t want to do a double fold seam and I didn’t have a serger. I decided to try to just zig zag stitch around all the edges and hope that would prevent fraying. Most things I make are lined so I don’t have to worry about fraying edges but I didn’t want to make a lining for this bag, just a single layer was enough. It ended up taking quite a while to zig zag stitch all the edges and then carefully sew the zipper on and sew all the pieces together. Around midnight, I finally had a large sturdy bag and I was happy to be done with it.
New Requirements – Rip #1
I took the bag downstairs and put the lifejackets in it and showed Ryan and he said it was fine but I could see in his face it wasn’t what he wanted. Apparently he wanted a more tightly fitting bag that would only fit the lifejackets that were in the bag and would fit them almost exactly. Obviously I didn’t do any more work that night but to avoid any further changes, I asked him to just measure for himself exactly what size he wants the finished bag. He drew it up, handed me his little sketch and left me to re-do the bag.
Since we were making the bag smaller, it looked like I wouldn’t have to buy new fabric or anything, just cut all the pieces smaller. I carefully used my seam ripper to take apart all the pieces and pull out all the thread (except that zig zag stitching since it was going to get cut off anyways). He wanted the finished bag to be 16” x 21” x 28” and I was going to use ½” seam allowances plus a double folded ¼” seam (the zig zag stitch wasn’t preventing the fraying) so I marked down the sizes to cut as 17” x 22” x 29”. I cut the first piece and then pressed over ¼” on each side, pressed over again and then stitched down.
Measure Carefully – Rip #2
Just to be sure I wasn’t messing up, I laid out the piece on my measuring mat to make sure that it was still an inch bigger than the finished size (since I had a ½” seam allowance) but was surprised (and upset) to find out it was the same exact size as what I wanted my finished piece! OH NOOOO!!!! Dummy me did this:
Finished size (16” x 21” x 28”) + ½” for Seam Allowance + ½” for double fold = 17” x 22” x 29”
But I should have added seam allowance and double fold allowance on EACH side so I should have added two inces to each measurement, not one! I was pretty upset so I put it away for a while and then even when I came back to the project, I just set that piece aside and continued with the other pieces (cutting them correctly this time). Once I was done with all the other pieces, I seam ripped out all the stitching in my double fold seam, re-stitched it with a single fold seam and then made sure I would remember which piece was smaller because I would need to use just a quarter inch seam allowance on that piece since it was smaller than all the others. Finally I was ready to sew all the pieces together.
Pay Attention – Rip #3
First I sewed the top to the right side piece and then I grabbed the next piece and sewed it on. Only to realize that instead of stitching the other side of the top piece to the left side piece…I accidentally sewed the bottom piece to it (think of a box) which obviously wouldn’t work, GRRR!! First I told Ryan I screwed up again, partially because I thought he’d get a good laugh about me having to rip it out AGAIN, and partially because I needed to walk away from it for a minute, LOL. So I ripped those pieces apart and FINALLY got all the pieces sewn together. All I had left to do was add the handle and I decided to just “wing it”. Shockingly, the handle came out fine, LOL. It was kind of risky to “wing it” based on how the rest of the project had gone but fortunately it all worked out.
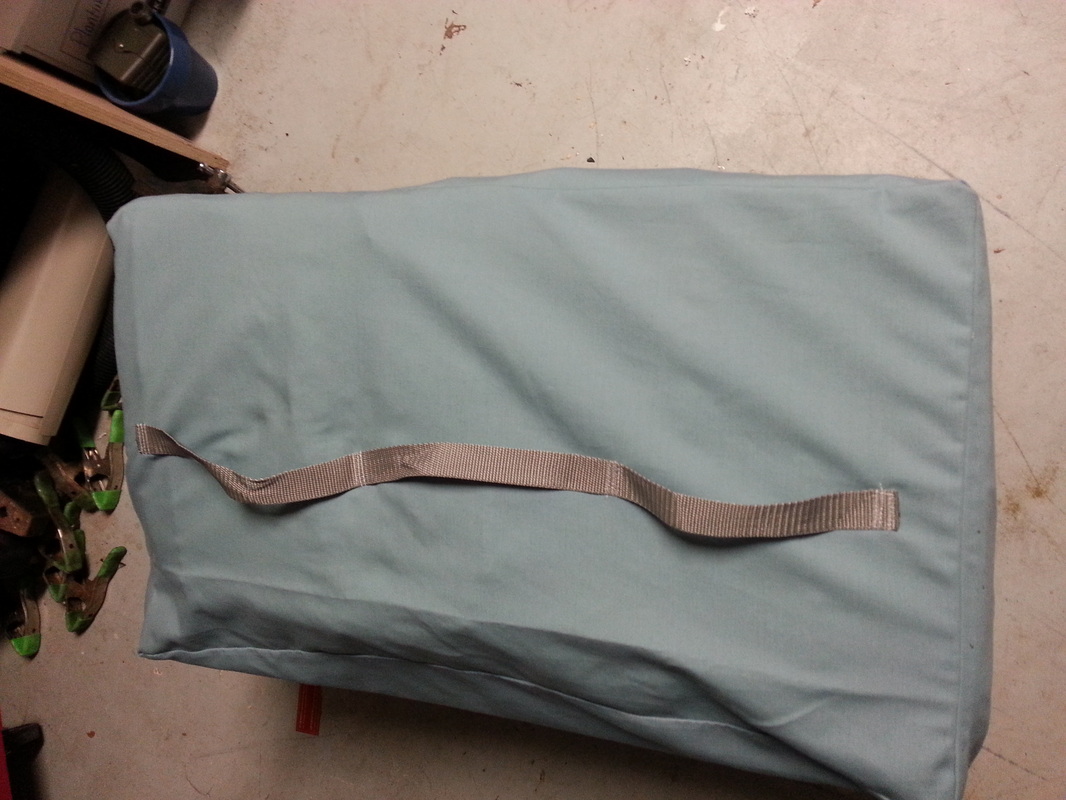
Here’s the simple finished bag that caused me so much headache:
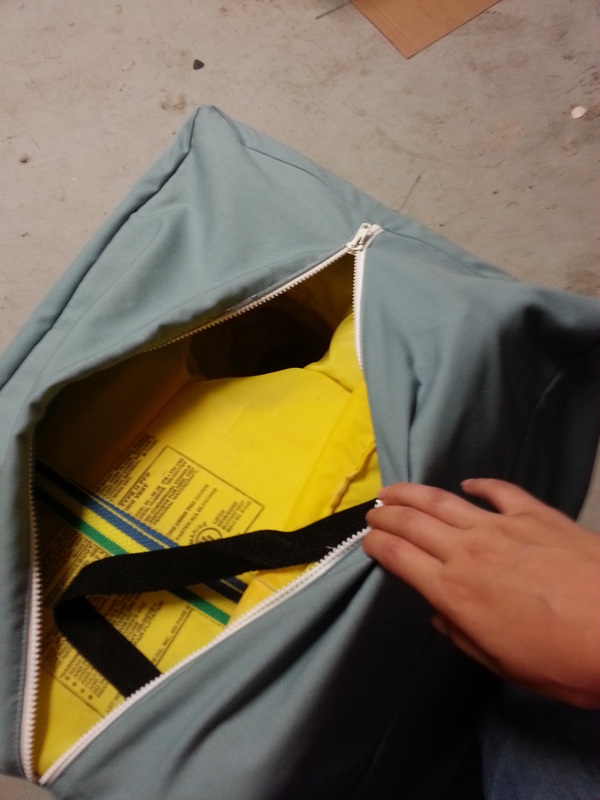
Here you can see the lifejackets in it (I think there are 10 or 12 lifejackets in there):
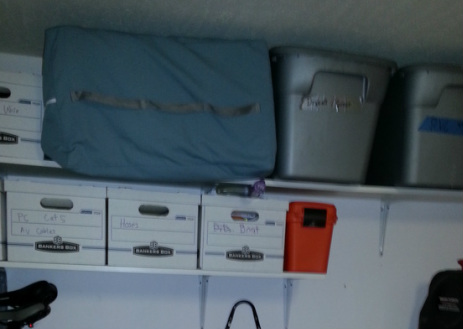
And finally, here’s his bag, easily stored up on his shelf and ready to be carried to or from the boat at any time:
So in summary, sometimes even the simplest projects can cause huge headaches even though more complicated projects went as smoothly as can be. But don’t give up – it’ll come out eventually if you just keep working on it (and don’t be afraid to rip it apart, LOL).


