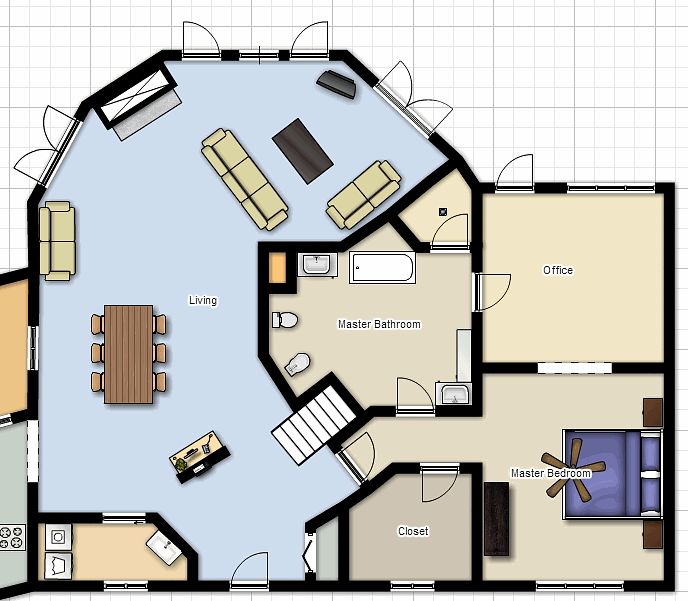
While we were at Mary’s waiting for the tile adhesive to set…we watched a LOT of television. More specifically, we watched a lot of HGTV. Seeing all those nice houses and remodeling inspired me to start planning a remodel of our master suite. I say master suite because my remodeling plans would affect the bathroom, closet and office (plus decorating the bedroom). The picture below is an approximate representation of our current downstairs floorplan. The top of the picture is the back of the house and the front door is at the bottom of the picture towards the center. The kitchen and garage are not shown and some other details may be slightly off but it’s pretty close.
Step 1: Evaluate existing layout
Closet: Our current closet is a pretty decent size and it has nice cedar paneling. However, it has a huge window that we always keep covered because we change clothes in there. It also needs to have more shelves along the wall where the window is but we don’t have any because of the window…It could also use a new light fixture and switch.
Bathroom: Our current bathroom is pretty large but there is a lot of wasted space due to its strange shape. But our biggest problem with the bathroom is that there is NO natural light in the bathroom and there’s no way to get natural light in there. The bathroom is surrounded by other rooms on all sides and even has a bedroom above it. Everything in the bathroom is outdated and ugly: pink tub, sinks & bidet; ugly grey tiles on the floor; pink shower and tub tiling; pink marble looking laminate countertops; old brass fixtures, etc. I want to completely start over on the bathroom…
Office: The room we use as Ryan’s office is actually an addition to the home that the previous owner’s built. It is perfectly square and has a huge opening from the bedroom (because the bedroom used to have French doors leading to the deck). It has a flat roof because they didn’t incorporate it into the roofline on the back of the house. They put wood paneling on the walls and ceiling but they must have had a hot tub in there because there is a ton of water damage to the paneling. The flooring is also the same ugly white/gray tile as the bathroom. The office has lots of windows – more than he even needs. Also, Ryan’s desk and bookshelf only take up a very small portion of the office and most of it is empty wasted space…
Step 2: Propose a New Layout
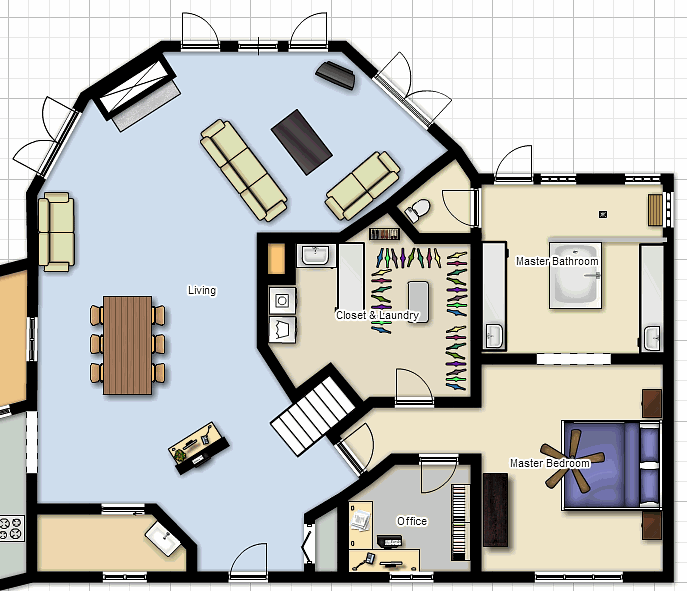
Fortunately for us, our house is not on a concrete slab – we have a crawl space underneath the house. There are a lot of reasons that concrete slab is better than what we have but for remodeling, having a crawl space means that we can do most of the work ourselves instead of having to pay a contractor to bust into a concrete slab to move plumbing. So I want to re-arrange all the rooms!
Closet: Our current closet is a pretty decent size and it has nice cedar paneling. However, it has a huge window that we always keep covered because we change clothes in there. It also needs to have more shelves along the wall where the window is but we don’t have any because of the window…It could also use a new light fixture and switch.
Bathroom: Our current bathroom is pretty large but there is a lot of wasted space due to its strange shape. But our biggest problem with the bathroom is that there is NO natural light in the bathroom and there’s no way to get natural light in there. The bathroom is surrounded by other rooms on all sides and even has a bedroom above it. Everything in the bathroom is outdated and ugly: pink tub, sinks & bidet; ugly grey tiles on the floor; pink shower and tub tiling; pink marble looking laminate countertops; old brass fixtures, etc. I want to completely start over on the bathroom…
Office: The room we use as Ryan’s office is actually an addition to the home that the previous owner’s built. It is perfectly square and has a huge opening from the bedroom (because the bedroom used to have French doors leading to the deck). It has a flat roof because they didn’t incorporate it into the roofline on the back of the house. They put wood paneling on the walls and ceiling but they must have had a hot tub in there because there is a ton of water damage to the paneling. The flooring is also the same ugly white/gray tile as the bathroom. The office has lots of windows – more than he even needs. Also, Ryan’s desk and bookshelf only take up a very small portion of the office and most of it is empty wasted space…
Step 2: Propose a New Layout
Fortunately for us, our house is not on a concrete slab – we have a crawl space underneath the house. There are a lot of reasons that concrete slab is better than what we have but for remodeling, having a crawl space means that we can do most of the work ourselves instead of having to pay a contractor to bust into a concrete slab to move plumbing. So I want to re-arrange all the rooms!
Old Office, New Bathroom
I want to make the room that is currently the office, into a new master bathroom. The square shape will make it easier to plan and it’s right off the master bedroom which will be nice. You’ll see I split the back window into two glass block windows and assume a shower head will come out of the back wall between the two windows. That back wall is a big walk-in shower. The gray line between the tub and back wall would be a ¾ wall with maybe some decorative glass at the top so that you can still see out from the shower and the bathroom maintains that open feeling without being able to see whoever is naked in the shower, lol.
I left a big space for a tiled in jet tub although Ryan prefers a clawfoot tub so we’ll see in the end. Regardless, the tub would go in the center of the room with the decorative shower wall behind it. I would probably want some shelves built above the tub on the shower wall to put candles and bubble bath and such.

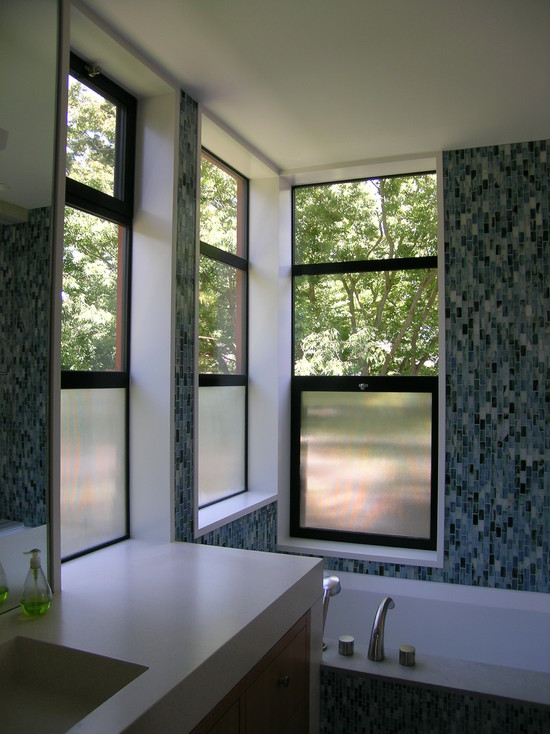
This is the closest pic I could find of what I would want. Only difference is I would want a solid wall to come up to about chest height and then the decorative glass above that. Pay no attention to the tile, flooring, etc...this is just to show the idea of the tub
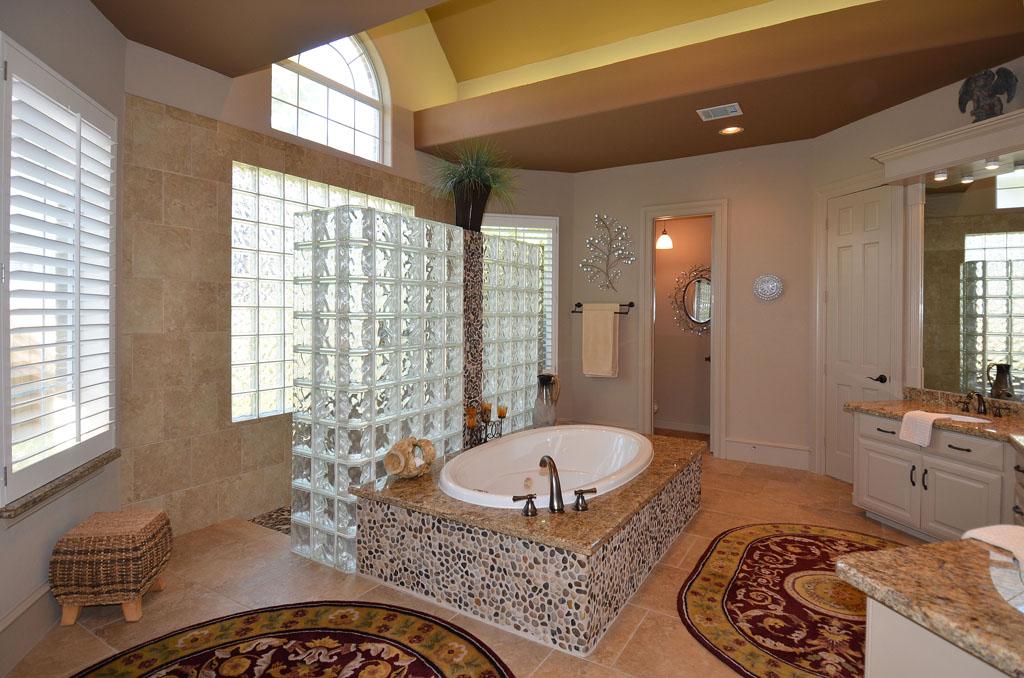
Our new bathroom would also have a window right behind it and Ryan LOVES glass block so this is also another good option/possibility
On the right side of the room you can see Ryan’s sink with a long vanity. The side of the vanity away from his sink would have storage for our towels since I don’t have a separate linen closet shown in the bathroom. I think we would also have a window of some sort here. He would have mirror over his sink but then there could be window over the storage area of his vanity.
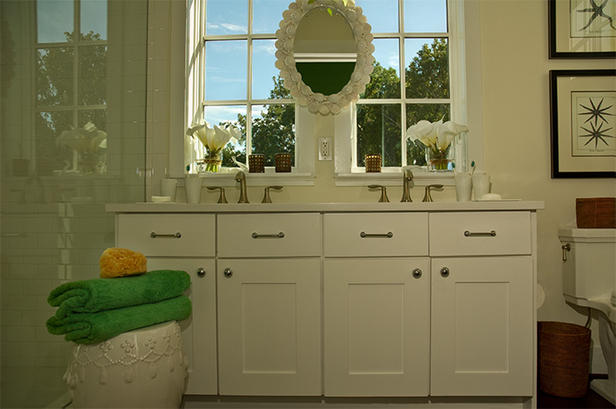
On the left side of the room, you can see my sink with a long vanity. I may leave part of the cabinet area open so you can have a little stool to sit at the counter like a makeup table (similar to my countertop in the bathroom I have now). This would allow for plenty of storage space in the counter plus lots of space for hair and makeup.
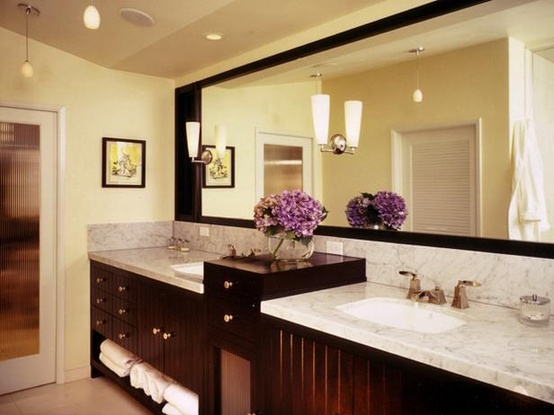
Love the huge mirror!

This is exactly the type of layout I want for my vanity. See the makeup bench at the end? And still lots of storage under the sink.
On the back left corner (between my counter and the entrance to the walk-in shower), you will see that I turned the odd shaped room that is currently our shower into a water closet for the toilet. Depending on how big this ends up being, I may be able to put some shelves in there for more storage as well, we’ll see.
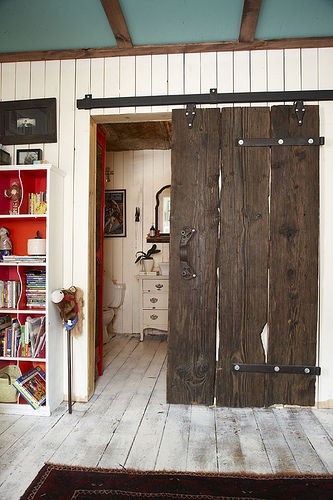
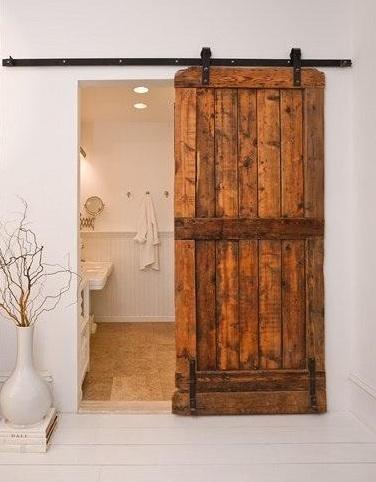
Lastly, the big opening between our bedroom and the bathroom would have beautiful barn doors on it (see below for an example) that would roll open as needed. The barn doors are kind of like pocket doors except they don’t go in the wall, they roll in front of the wall and the doors are usually more decorative.
Old Bathroom, New Closet
I like the idea of making the odd shaped room into the closet because we can easily create custom shelving that makes the odd corners less noticeable and turns them into usable space. Additionally, you’ll see that where we currently have the toilet and bidet, there is enough room to put the washer and dryer there. Our washer and dryer are currently in the garage and during the summer it can be quite hot out there doing laundry. Plus I wouldn't have to take the clothes very far to put them away if the laundry room is part of the closet! You can see I left the area where Ryan’s vanity currently is for a wash basin for hand-washing clothes. I also put in a small cabinet/vanity for laundry room storage and then there would be hanging space above that for things that need to dry. Then I could do all my folding and hanging in the laundry room/closet.
Of course I will have plenty of storage built in for our clothes and shoes. We need way more storage for our shoes. I think this area would work so great for a closet and laundry room and I think it would make laundry so much easier not having to trek in and out of the garage (plus it will give Ryan even more room for shelving out in the garage).

cute old fashioned laundry room. I like the expanding drying rack and the spot for the ironing board
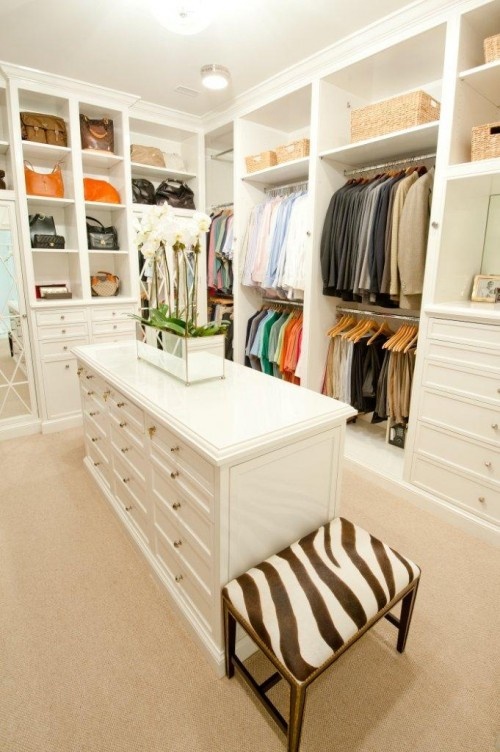
Old Closet, New Office
Our existing closet is actually pretty large. I measured it out and, as you can see in the picture, you can comfortably fit a desk, bookshelf and a few other odds and ends in there. Plus it has a window so the natural light should help to prevent it from feeling closed in. Ryan said he thought it would be plenty large enough for us for an office.
Our existing closet is actually pretty large. I measured it out and, as you can see in the picture, you can comfortably fit a desk, bookshelf and a few other odds and ends in there. Plus it has a window so the natural light should help to prevent it from feeling closed in. Ryan said he thought it would be plenty large enough for us for an office.

So obviously this would be a lot of work and not cheap either. We’ll have to save up money to do a little bit at a time and also plan carefully so we can do as much as possible without affecting the use of our current bathroom. I’ll write more about these once we get them figured out but here’s what I think our next steps are:
Step 3: Structural Changes
Re-measure everything to get an accurate floor plan. Finalize the layout including tub/shower size, vanity sizes, etc. to determine all structural changes necessary and figure out their cost.
Step 4: Bathroom Design Proposal
Work out at least approximately what colors, fixtures, finishes, tiles, etc we want to put in the bathroom and start figuring out our cost or budget for the non-structural issues.
Step 5: Implement Structural Changes
Step 6: Implement Office to Master Bath change
Step 7: Demo old bathroom and convert to closet space
Step 8: Convert closet to office
Step 9: Bedroom upgrades (paint, molding, fixtures, etc)
Step 10: Finish our upgraded Master Suite!
It seems highly unlikely that we would finish this project in 2013 so I’ll say the goal is to have steps 1 – 5 implemented this year. I think that will be the most planning and labor intensive. The bigger costs will come into play when we actually buy all the stuff for the new bathroom like the tub, shower, vanities, lighting, tile, decorative glass, etc
What do you guys think? Do you like my proposed layout? Or do you think I’m crazy?


