Quilted Affair
  • Home
    • About Me
    • Gallery
  • Blog
  • Shoebox Swap
    • Sign Up to Swap
    • Current Swappers
    • Rules & Guidelines
    • Stop Swapping
  • Etsy Shop
  • Facebook Page

How To Make Cornhole bags

3/14/2012

32 Comments

 
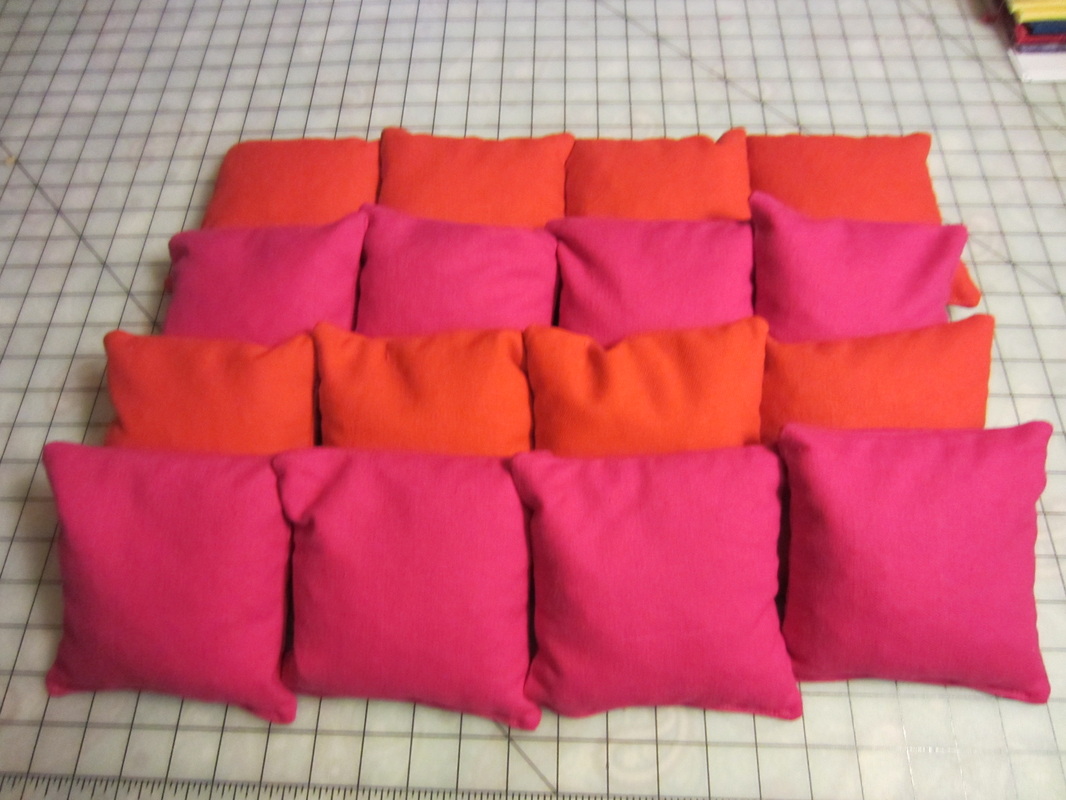
Ever wondered how to make your own cornhole bags?  Well it's pretty simple so I'm going to show you how.  First you need to pick two colors of fabric; I recommend buying Duck Cloth (it's a type of fabric) or another heavy duty external fabric.  To make one set of corn hole bags you will make 4 bags of each color.  Most of the home decor fabrics are 56" wide so you will need 0.5 yards of each color - if your fabric is less than 56" wide (some are 52" and some are 44") then you should buy 0.75 yards.  If you can't find a pretty fabric you like in the home decor section, then you can buy regular cotton fabric and iron on interfacing on the back of it.  In the photos below, I am making two sets so you will see 8 bags of each color instead of 4 bags but my fabric and cutting instructions are to make 4 bags of each color. Anyways...so you bought your fabric...now what?

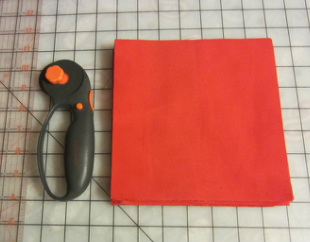
Cut (8) 7" x 7" squares of each color (a rotary cutter and ruler are very helpful but scissors will work just fine)
Picture
Take two squares and put the right sides together (the back of the fabric should be facing you).  Pin them together.  The placing of the pins isn't too important but you need enough to keep them together and without sliding apart.  Do you see the pins at the bottom of the square?  We aren't going to sew between them.
Picture
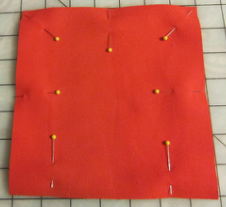
Sew around three full sides (and all four corners) but don't sew in between the two pins along the bottom edge.  Repeat with the rest of the squares.
Picture
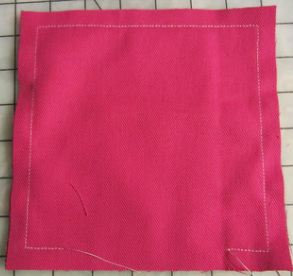
Clip your corners (to make the corners less bulky when we turn it) and snip your threads close to the fabric.
Picture
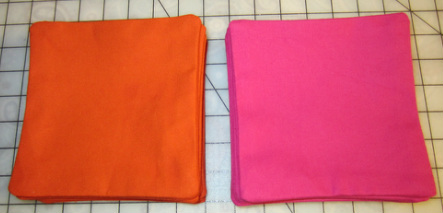
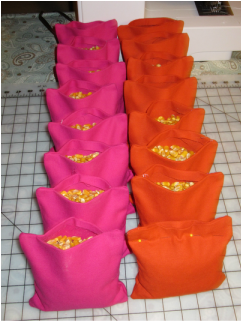
Flip the bag inside out so that the right side of the fabric (the side with the designs) is facing you.  Use point turner (shown below), a pen/pencil or your fingers to push out the corners of the bag. 
Picture
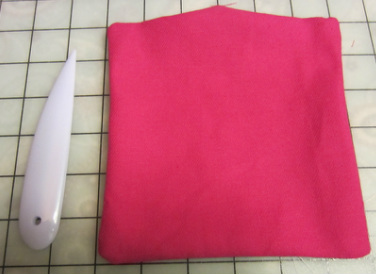
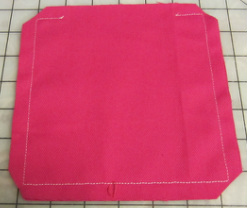
Use your iron on a hot/cotton setting to press the edges of the bag.  On the side with the opening, fold the edges to the inside of the bag and press.
Picture
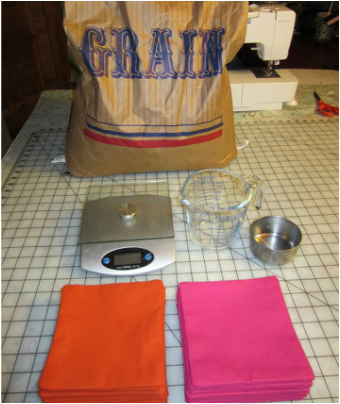
Now it's time to fill the bags.  You will need a digital kitchen scale, a container to set on the scale and a scoop.  To fill the bags, I recommend feed corn.  I bought mine at a small feed store I pass on my way home but I'm sure you can get it at Tractor Supply or other similar places.  Unfortunately the smallest bag I could buy was 50lb - if that is the case for you too, don't panic!  The bag was only $12 and it will make 6 full sets of cornhole bags.
Picture
Each bag should weigh 16oz including the bag and the corn.  Weigh the empty bags first, mine weighed 0.6oz (I weighed a few to be sure).  Set your container on the scale (I used a 2 cup measuring cup), turn on the scale and zero it.  Add corn until you get to 15.4oz (or 16oz minus the weight of your cornhole bags you made).
Picture
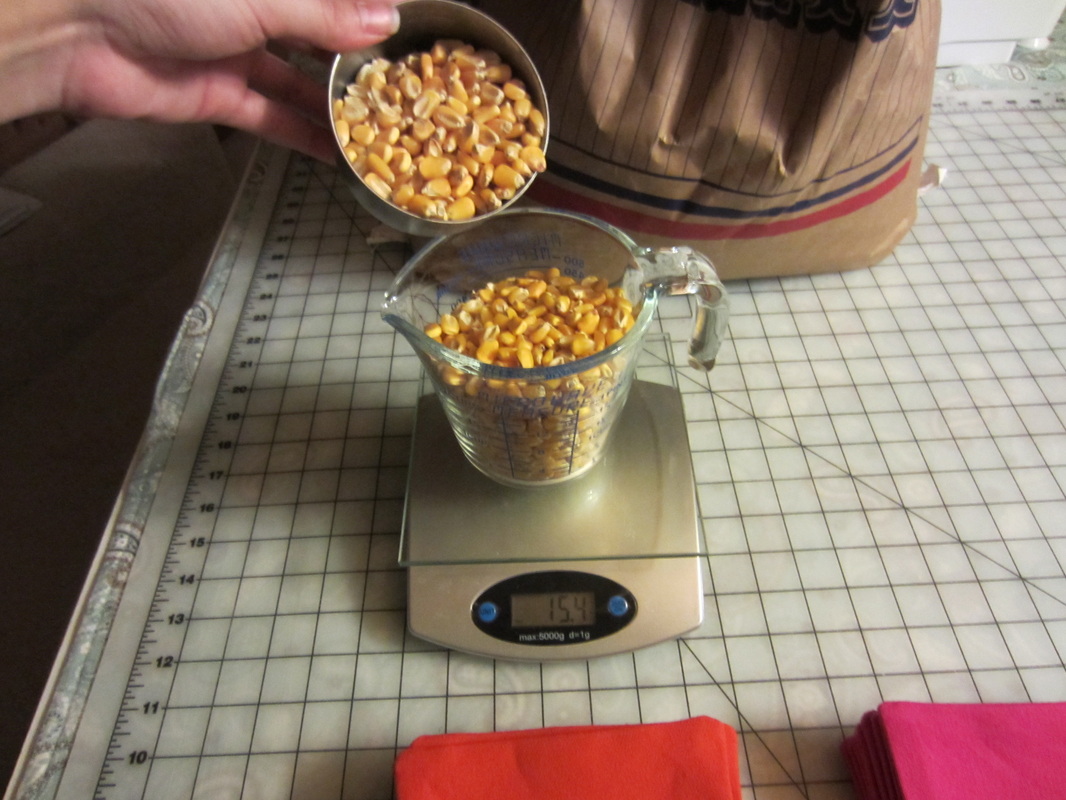
Pour the corn into a bag (this is why I liked the two cup measuring cup with the spout and good handle).
Picture
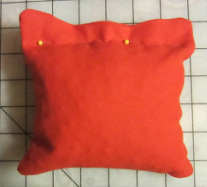
To pin the bags shut, take one of the bags and tap it on the table to make sure the corn has settled into the bag.  Grip the bag and pin it closed, with long pins, as close to the corn as possible.  This will make it so you can keep the fabric flat under the presser foot and the corn can't get in the way.
Picture
Picture
Stitch close to the edge (I was aiming for about 1/8" away from the edge) without going off the edge.  When you get all the way across, turn the bag without lifting the needle and stitch back over what you already sewed.
Picture
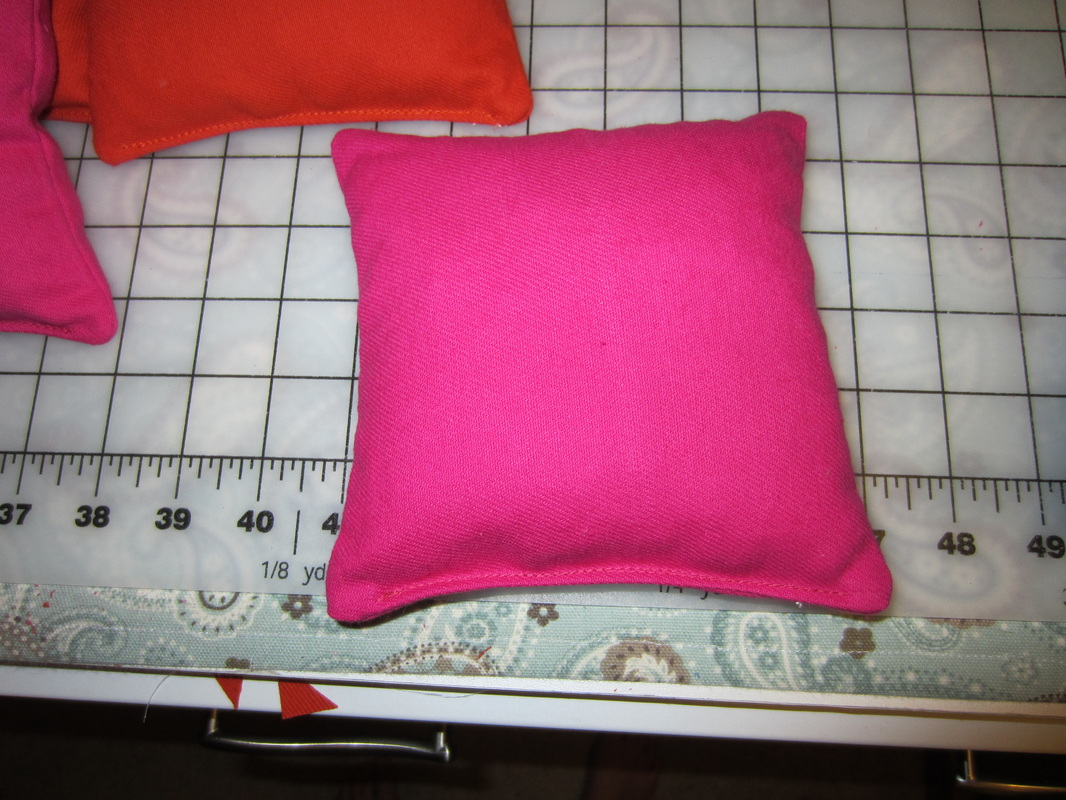
Clip the threads and voila! You're done!
Picture
Just a note of caution: do not leave them outside overnight.  They are very resistant to moisture and sunlight but the squirrels or raccoons eventually got the best of ours and tore them apart to get at the corn inside.  As long as you don't let them get eaten by the critters, they should last for many games of cornhole so game on!
32 Comments
Kayla
3/15/2012 08:33:13 am

I'm sorry we forgot to give you corn for them! It looks like you did an amazing job. I totally would have just poured corn into them until they seemed full :) hehe

Reply
What is the size of the seams?
7/9/2014 09:17:28 am

Reply
QuiltedAffair
7/13/2014 11:07:48 am

I used .5" seams just to make sure the seams were plenty strong and wouldn't fray too much after making them.

Reply
excellent tutorial!!!! I made a set and they came out beautiful!!!
7/29/2014 07:12:02 am

Reply
Stephanie
7/29/2014 07:12:58 am

Excellent tutorial!!! I made a set and they came out beautiful!!

Reply
What are the finished dimensions of the bags?
1/4/2015 01:02:54 am

Reply
Maryann link
6/11/2016 06:35:46 am

It should be 6 inches square.

Reply
Michael Anderson
6/20/2016 07:19:06 am

the finished size is 6"

Donna
6/18/2015 01:24:04 am

Important !! Feed corn often contains bugs and/or bug larvae. A major problem can be avoided if you put the corn in a zip lock bag and put it in the freezer for 48 hours before you fill the bags. If you don't, in a few days/weeks, the bugs will eat there way out of the bags.

Reply
ENH
6/12/2017 11:55:45 am

Feed corn does not contain Bugs. Especially if you are buying it from a store like TSC were all their corn is cleaned before it is bagged.

Reply
Cheryl
9/3/2017 09:24:10 am

If not using feed corn what would you use?

Reply
Yvonne Jenkins
4/23/2020 04:20:07 pm

I used to make neck noodles and bought 20 lbs of rice to make them. Worked very well. Whole corn kernels are clumsy.

Erin
7/25/2015 06:07:04 am

I came across your tutorial while looking for a pattern for beanbags for my music classroom. It's great! Thank you for sharing!
Another music teacher friend of mine filled his beanbags with pea gravel or aquarium gravel instead. This might solve a lot of potential problems and he said you can even put them in the washer and dryer, which is great when you have a lot of children using them over the years. Thanks again for your tutorial!

Reply
Terri
7/17/2018 11:51:18 am

Would aquarium gravel be heavier per inch and therefore not fill a bag at 16 oz? I want the right weight, but not critters eating them

Reply
Suzy
9/3/2015 03:49:14 am

Very good tutorial. When I filled my bags, they seem very full. Are yours and after much play time, does the corn settle to make the bag more flexable.

Reply
mara portela
10/16/2015 12:24:03 pm

Reply
Bill weaver
4/17/2016 02:40:21 am

Your are working way too hard. I cut my fabric 7" x14". Fold the 14" side in 1/2". Iron the half inch. Then fold in half. And press. Sew two sides that are not turned down the half inch. Turn right side out. I fill cheap sandwich bags. Not Ziplock. Insert. This keeps the corn from sliding out when sewing. I use no pins. Simple fast...

Reply
Donna link
6/27/2016 10:26:44 am

I don't have a kitchen scale. How can I measure my corn?

Reply
Susan Lee
5/16/2017 09:30:39 am

I found this post while looking for a DIY replacement for our missing cornhole bags. I ordered some canvas from this site https://www.canvasetc.com/product-category/cotton-duck-canvas-fabric/ and they were shipped to me in no time, the directions were simple and they turned out great! Thank you!

Reply
Elise N. Hurt
6/12/2017 11:54:27 am

Just as a future FYI to anyone that wants to make their own bags. Try finding a local feed mill or elevator in your area. They all have the ability to sell you smaller quantities of corn. And to the person that said all feed corn has bugs. You are sorely mistaken, corn from TSC gets cleaned so no bugs there. And plus I work at a feed mill and none of our Corn has EVER had bugs in it. Even if it did there is a dust that we put into the bin to prevent bugs from multiplying
.

Reply
Elaine
6/28/2017 06:41:11 am

Feed corn does in fact contain bugs. I read all these threads and bought a bag for my cornhole bags and when I got home to make them there were hundreds of grain weevils in the corn. Now I am going through the process of rinsing all the corn and putting it in the freezer before I can make my bags. From what I read ion several sites., it is very common to have bugs in your grain

Reply
Alycia
7/8/2017 10:31:35 pm

Even if the corn is cleaned so it doesn't contain bugs, it is probably stored in the same area as wheat, hay, and all sorts of other products bugs like. So if any of those items, or even the shed they are stored in, have bugs, they could easily migrate to the corn bags.

Melissa
6/28/2017 05:18:57 pm

I just bought pinto beans van I use that instead?

Reply
Breanna
7/15/2017 02:17:45 pm

So this might be a silly question but Do you have to use feed corn?? What can't you use regular pop corn kernels?

Reply
Candy link
11/25/2017 01:59:01 pm

Love this tutorial. Used it exactly. Thanks for sharing!!!

Reply
Genie
2/6/2018 01:14:07 pm

I used beadsas a filler... problem solved. :o)
Plus, I can send'em through the washer without any problems. :o)

Reply
Jim Schott
7/24/2018 12:59:26 pm

Question can you use wood pellets......no bug worries......

Reply
Colleen R. Kitchen link
8/16/2018 10:47:48 am

I guess people want to use corn because the name of the game is cornhole.

Reply
Chrissy Lyons link
8/17/2018 01:16:10 pm

What kind of interfacing can I use on regarding cotton material.?

Reply
John
5/16/2019 06:25:37 pm

You never had issues with those corners blowing out being cut off at an angle like that?

Reply
Opal Trites
8/19/2020 04:01:39 pm

Is it okay to use outdated cooking pinto beans instead of corn?

Reply
Agatha Pace link
12/21/2020 12:28:11 am

Thank you for shharing this

Reply


Leave a Reply.

    About Me...

    I am a part time quilter, full time engineer and hope to one day become a full time quilter.  Feel free to read along as I explore quilting, cooking and anything else that strikes my fancy.

    Picture
    Follow Me on Pinterest

    Browse By Month

    July 2014
    June 2014
    May 2014
    April 2014
    March 2014
    February 2014
    January 2014
    December 2013
    November 2013
    October 2013
    September 2013
    August 2013
    July 2013
    June 2013
    May 2013
    April 2013
    March 2013
    February 2013
    January 2013
    December 2012
    November 2012
    October 2012
    September 2012
    August 2012
    July 2012
    June 2012
    May 2012
    April 2012
    March 2012
    February 2012
    January 2012

    Browse By Category

    All
    Alpha Phi
    Animals
    Anniversaries
    Baby Gifts
    Boating & Beach
    Cooking
    Crafts
    Embroidery
    Healthy Living
    Holidays
    Home Projects
    Nails
    Product Reviews
    Ryan's Hobbies
    Ryan's Hobbies
    Scrap Basket Sunday
    Sewing
    Shoebox Swap
    TV & Movies
    Vacations
    Weddings

    Search My Site

    Loading

    Follow My Blog

    Enter your email address:

    Delivered by FeedBurner

    Follow on Bloglovin

     Subscribe to RSS Feed

    I Participate!

    WIP Wednesday at Freshly Pieced

Powered by Create your own unique website with customizable templates.