Once I decided I was ready to decorate our guest room, I knew I needed a dresser to go in there. I had a small dresser from when Ryan was younger up there but it was really the wrong shape dresser for the room - I wanted one long and low. So I found this little guy on Craigslist - it was a little more than I would have liked to pay but I wanted one right away and this is EXACTLY what I was looking for.
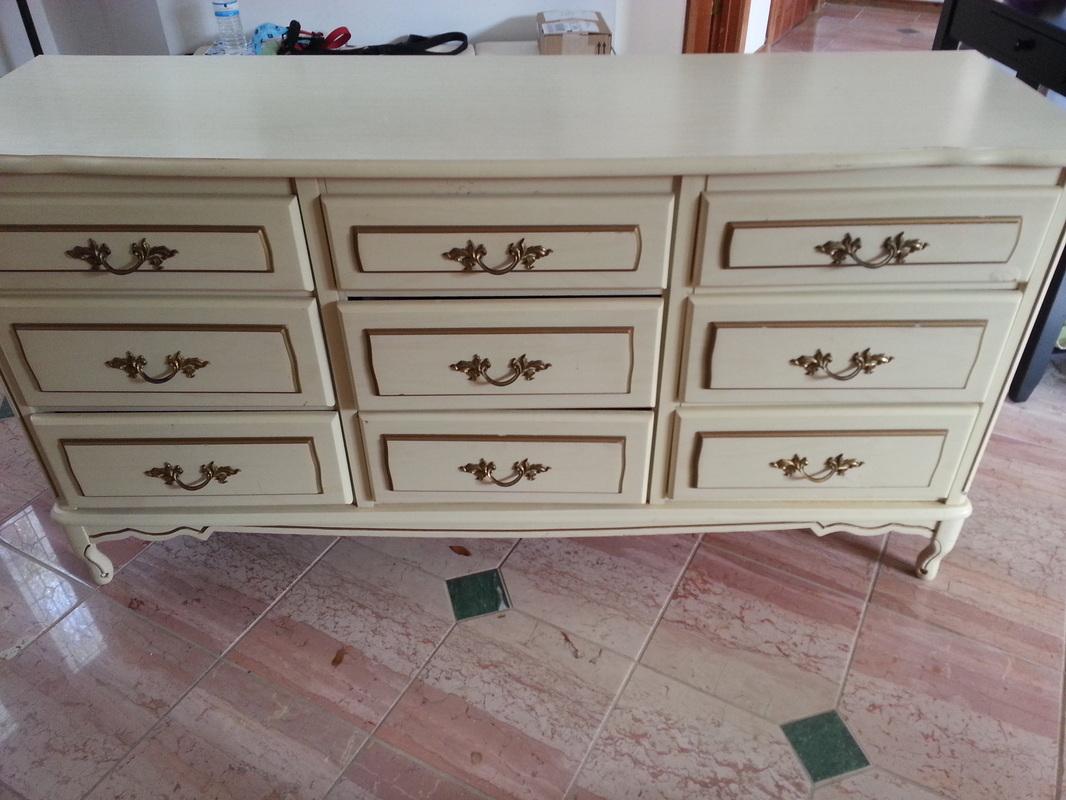
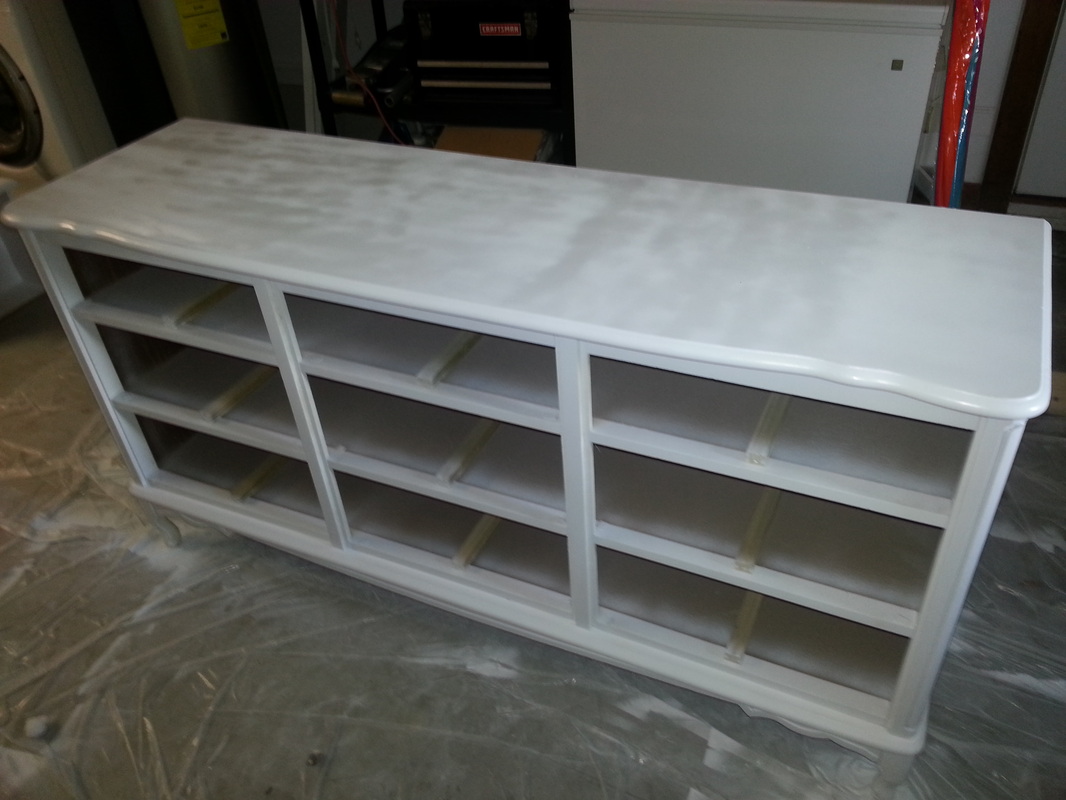
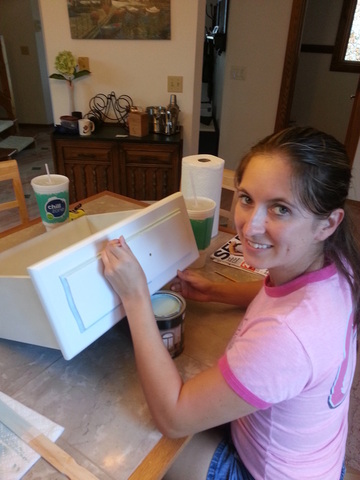
Ok, you got me - it wasn't EXACTLY what I was looking for. But it was darn close! I was hoping for a white dresser (that's cream) and I really don't like gold/brass accents. What to do? What to do? Oh ya - paint it! I read lots of blogs about painting laminate furniture because I'd never done it and I decided to follow the advice of Virginia from Live, Love, DIY and prime it really well and then use a foam roller and brush to paint it white. But as soon as we got to the store Ryan talked me out of it and convinced me to get a spray on lacquer instead. So I removed the hardware and sanded the dresser down a little just to get rid of the shiny finish (I thought you weren't supposed to sand laminate furniture but this is Ryan's idea to do it this way so I followed instructions). Then I went through quite a few cans of spray lacquer trying to get every surface nicely coated. Here's an in-progress pic:
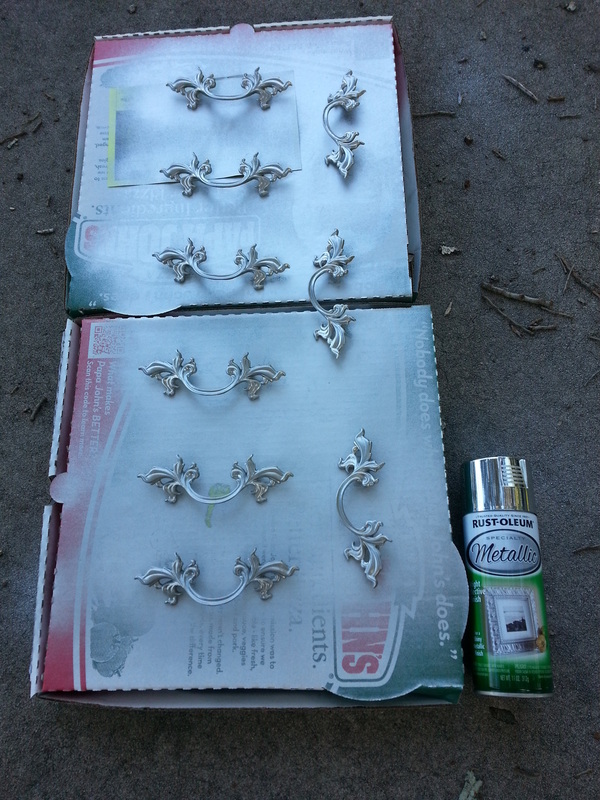
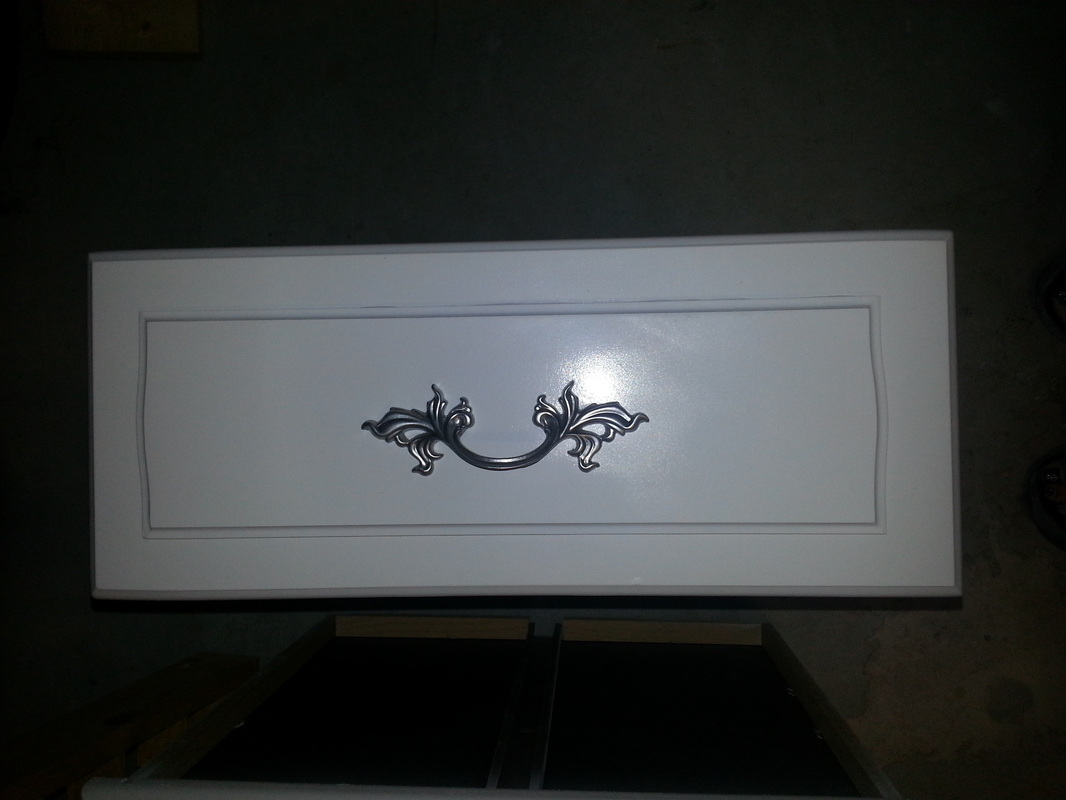
While the lacquer was drying on the dresser and drawers, I spray painted the hardware I had taken off with a silver/metallic spray paint by Rustoleum.
I couldn't wait until the end of the project to see how good the handles would look so as soon as the drawers were dry enough for me to set a handle on their without damaging the paint I put one on. So exciting! I love silver so much more than the brass look.
I let the lacquer dry for a full 24 hours and then used some steel wool to gently go over rough spots and remove the dust/overspray that had gotten on a few areas. We did quite a few coats of paint on the dresser body, sanded a few times and ended up coating it with a clear lacquer on top. If you look at the "before" picture, you'll see it used to have gold accents - I decided I liked the accents so I painted the same areas that used to be gold with a light blue lacquer. I bought a small can of oil based enamel and got it tinted light blue (I used the same color as what's on the walls in my quilt room). Here's me painstakingly painting around all the drawer edges. I probably should have taped it to come out a little more perfect but it was tedious enough without taping, LOL, taping would have taken forever.
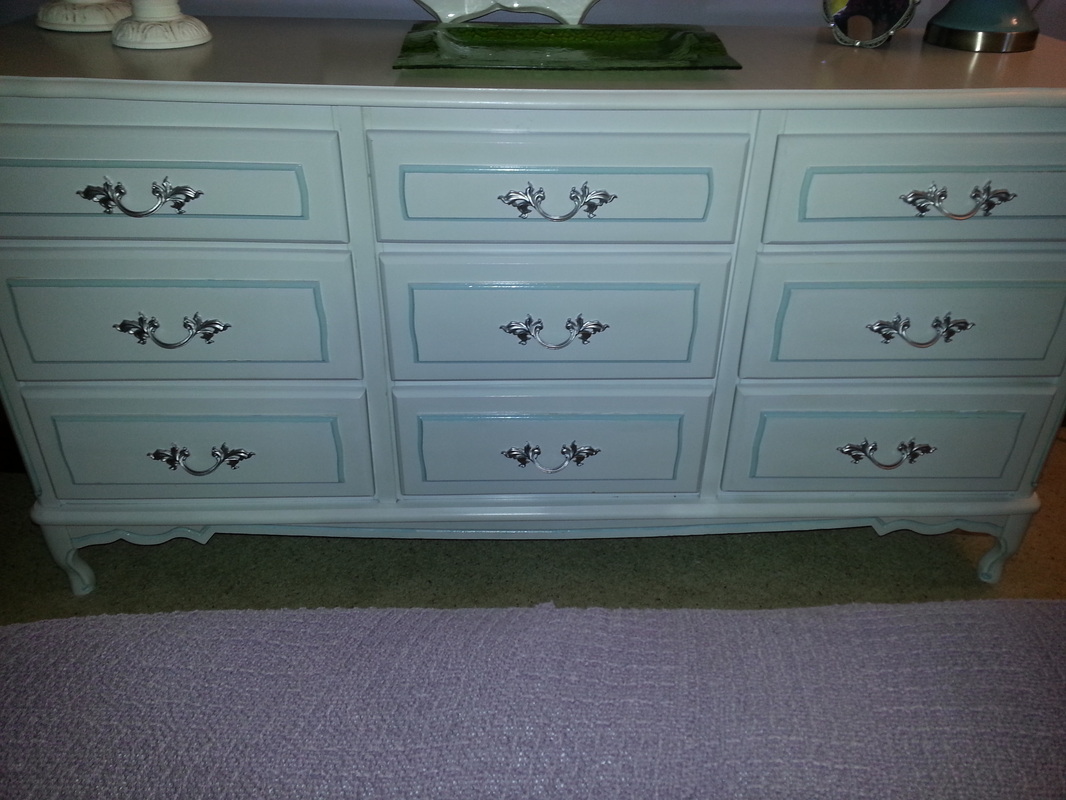
It wasn't the easiest to get this sucker up our stairs that wrap around a corner and then into the guest room but it was totally worth it. Look how great it looks!