A few years ago, Ryan and I were discussing some cool new toys out on the market - he wanted a 3D printer and I wanted a laser cutter. Well, I got him a 3D printer as a wedding present but I have still been wanting a laser cutter ever since. This year, he completely surprised me and got me one as an anniversary/Christmas gift!
This is a relatively inexpensive Chinese laser cutter called the K40. It is a 40W CO2 laser that can cut or engrave on wood, fabric, acrylic and other materials up to .25" thick. It isn't intended to cut metal but it could etch it. You also have to be careful with cutting plastics because some plastics give off toxic fumes when you burn them (which is what the laser is doing). I thought I would be able to cut vinyl with it but it gives off a gas that is harmful to people and the laser so instead, I realized i could get thin plywood and cut letters out of it. I had an idea for a Christmas present for my sister-in-law and wanted a bunch of letters. Here's a little video of how the laser cutter works:
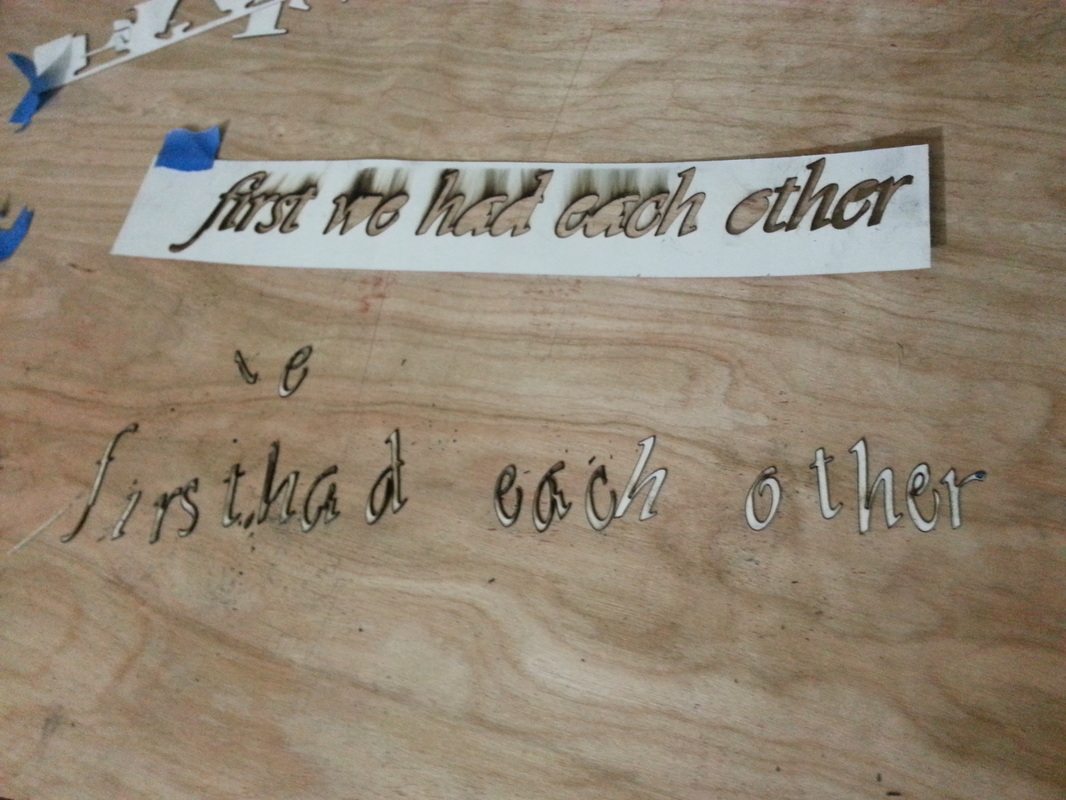
Here's a better look at the letters that kept burning up. I think it was a combination of the letters being too close together and the font being too thin. The flames would just burn up the thin letter sections so easily.
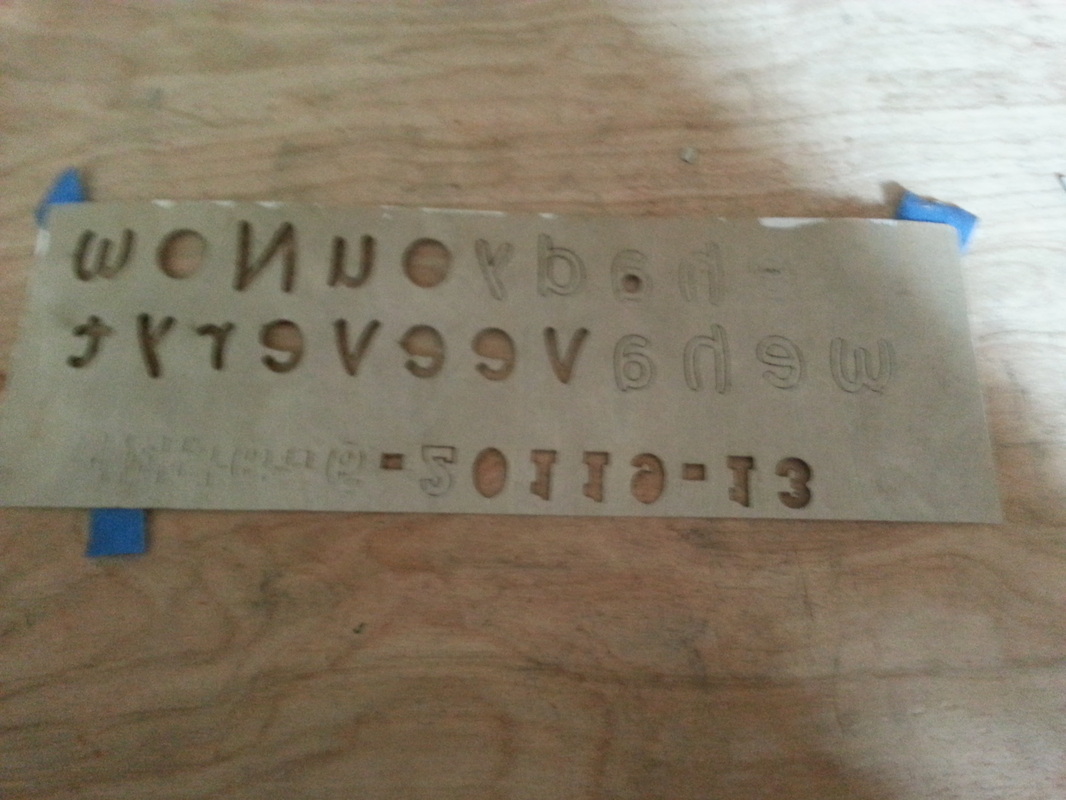
Also, I mentioned that I had to make multiple passes to get the letters fully cut out. Here's a picture of the back of the plywood where you can see that some of it didn't get cut all the way through.
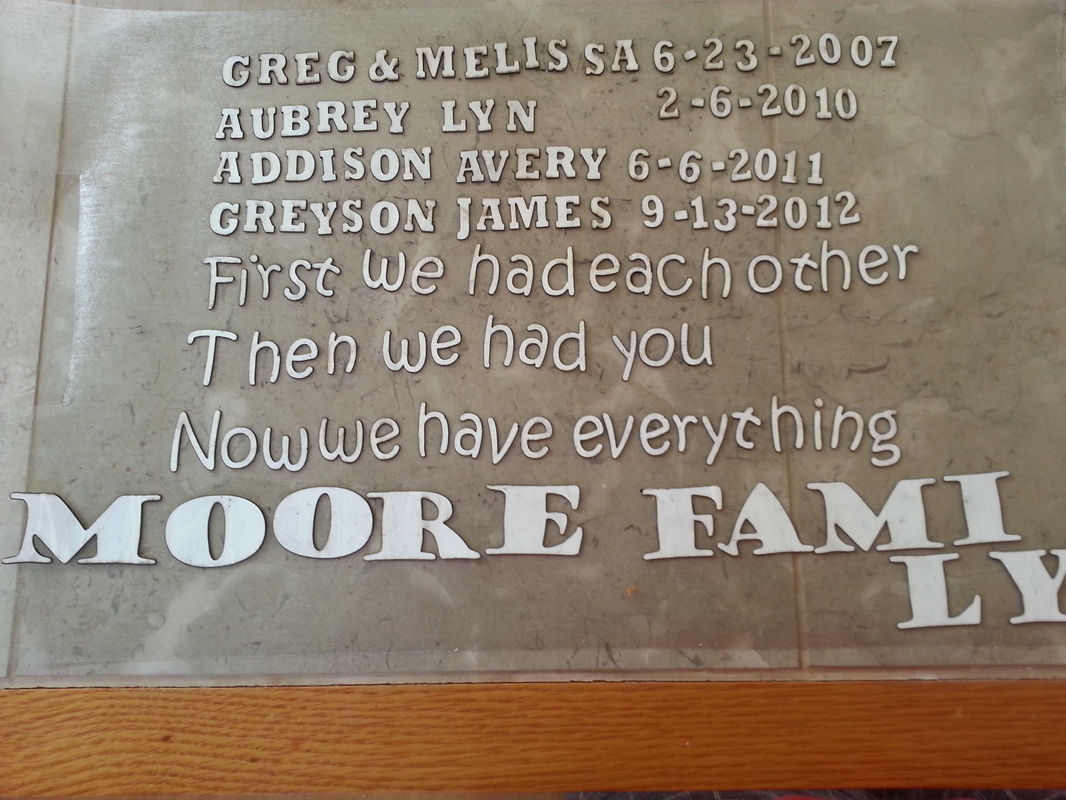
Here's all the letters right after being cut:
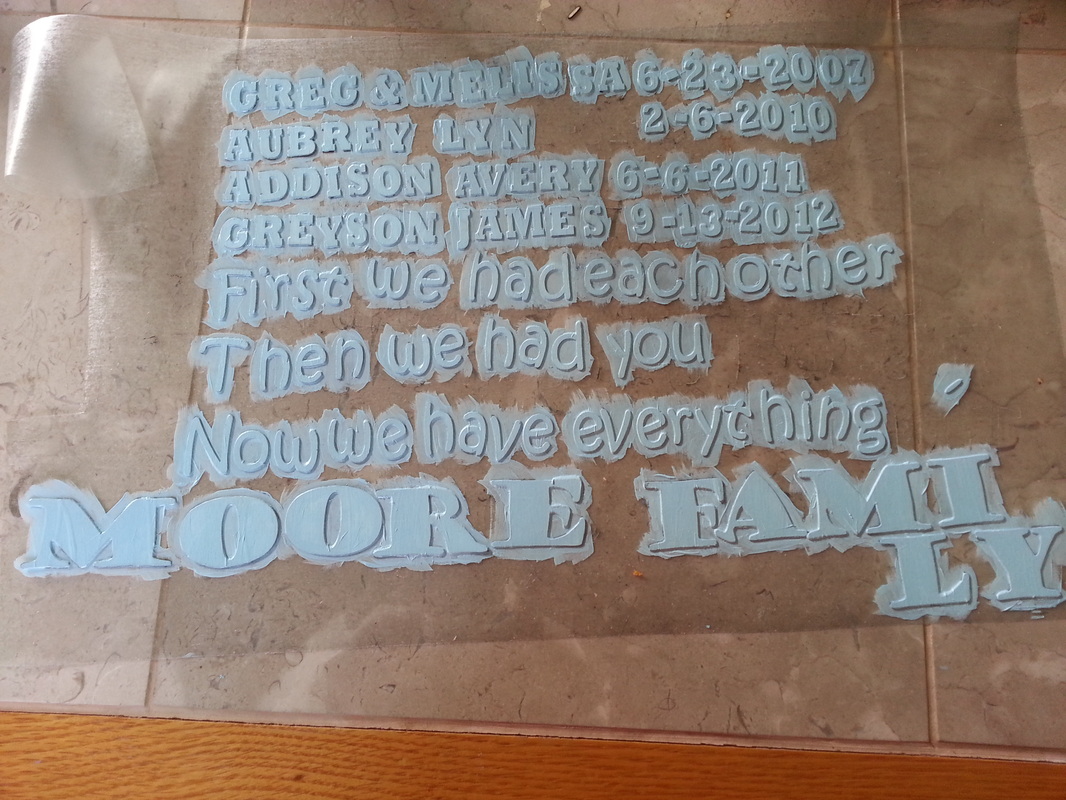
I had originally painted the entire sheet of wood before cutting but I neglected to cover the painted surface with masking tape so the letters got all dirty with ash from the smoke and burnt edges. I decided to repaint them blue. I stuck them all on contact paper so I wouldn't have to try and hold each letter. The downside is that after painting them, the edges were not nearly as crisp as they were right after cutting. I ended up using an xacto knife to trim off excess paint once they were dry.
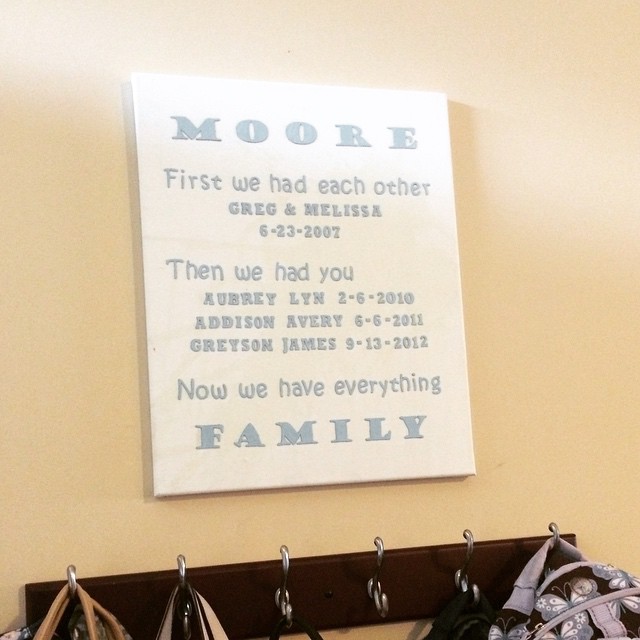
I decided to just glue the letters onto a canvas instead of a piece of wood. I already had an extra canvas and I figured it would be easier to hang than a heavy piece of wood. I lined up a row of letters on the canvas and put a strip of painters tape across the whole row. Then I flipped it over and brushed glue on all the letters in that row and pressed it onto the canvas.

It did take a bit of work but if I didn't have to repaint the letters it actually would have been a pretty quick project. Considering these signs sell on Etsy for well over $50, it was definitely worth the effort. Plus I got to play with my new toy :)
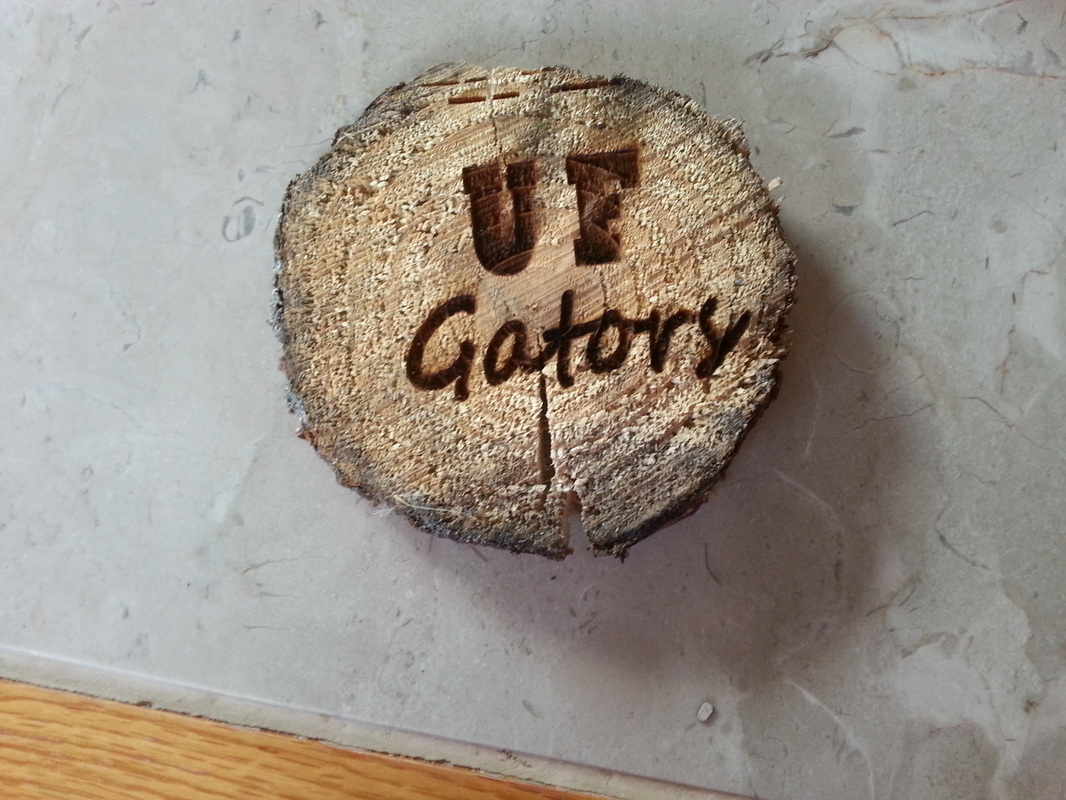
We were also going to a Christmas party with a White elephant gift exchange and I had an idea for a quick little ornament. This was my first attempt at engraving (instead of cutting) and it came out pretty good! I just typed the text in the software, set a cutting off a tree trunk in there, cranked up the power and let it run.