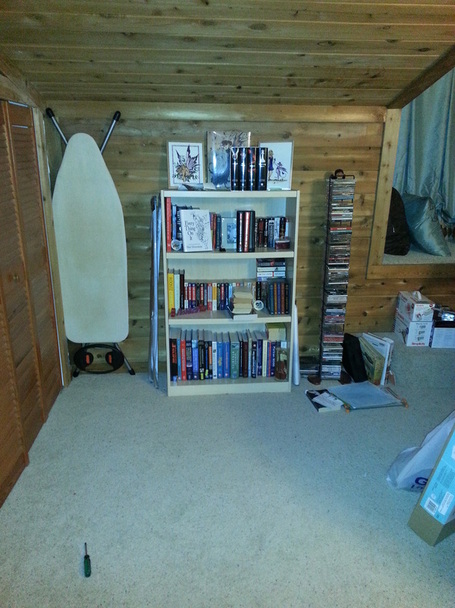
Once I got that modular storage area finished and made all pretty...it was time for a little closet makeover. Since I took away the actual bookcase I used to have against the back wall, I needed a place to put my reading books. The original bookcase (shown below), got moved to the theater room with both of our college text books. But I wanted to keep my reading books in the quilt room since that's where my reading nook is.
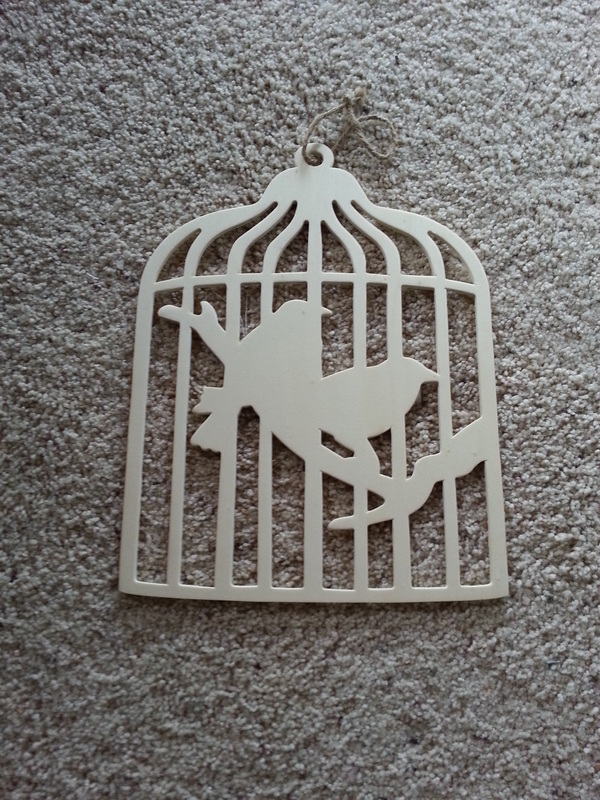
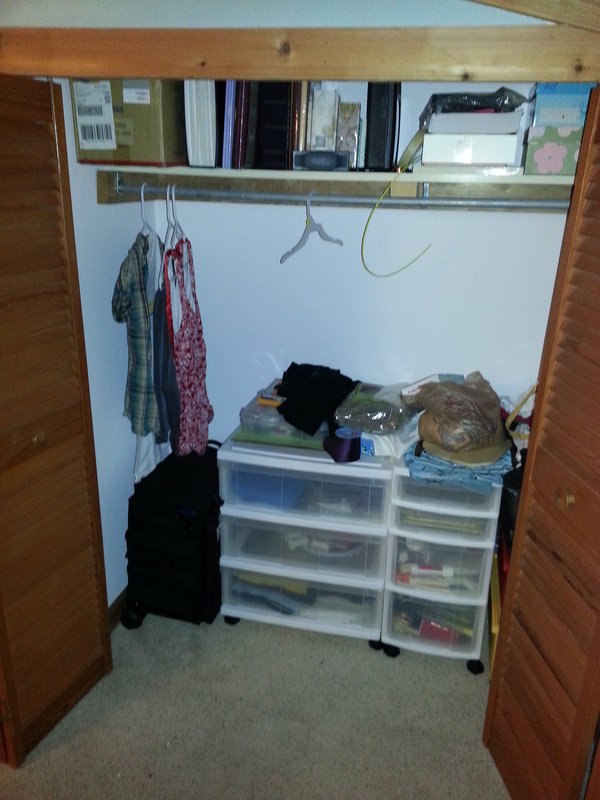
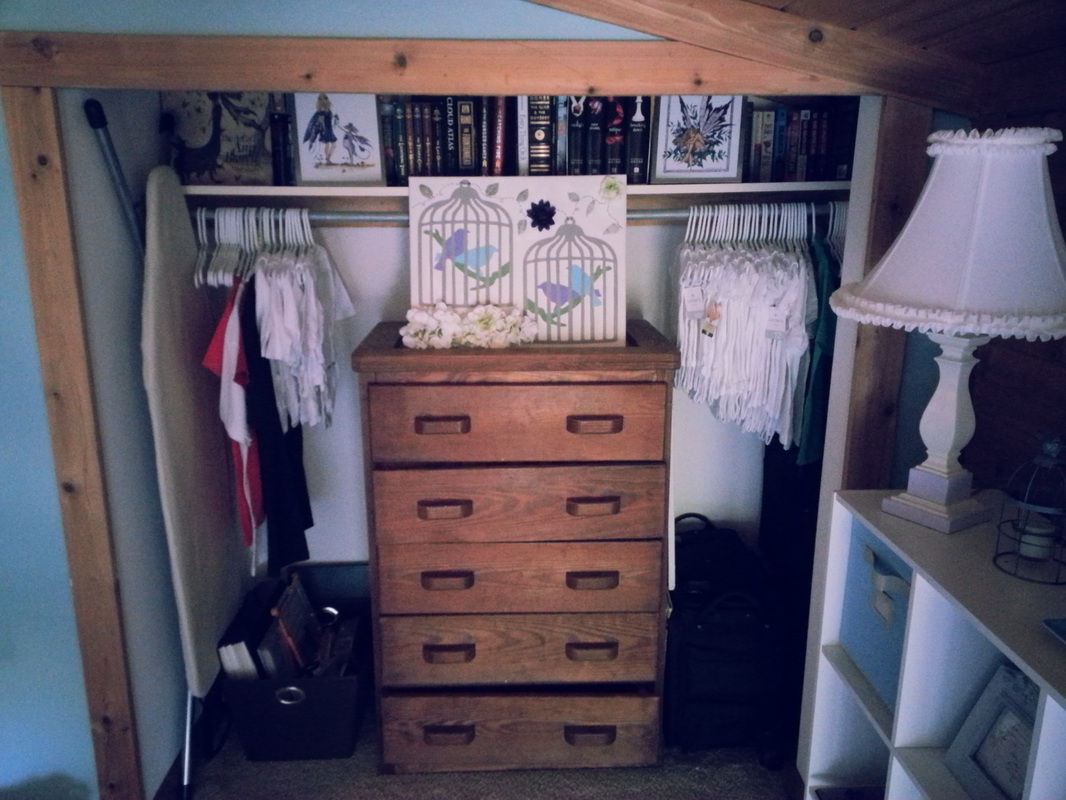
I decided to get rid of all of those plastic storage drawers from the closet and move out a bunch of the other junk in there too. Instead of the plastic drawers, I stole the dresser from the guest room and moved it in the closet instead, and then just took the doors off of the closet to make it look like part of the room instead of a closet. Only thing I really needed was a canvas or decorations to put on top of the dresser. I found these little wooden birdcages my stepmom had bought me before the wedding and decided I could use them to make something.
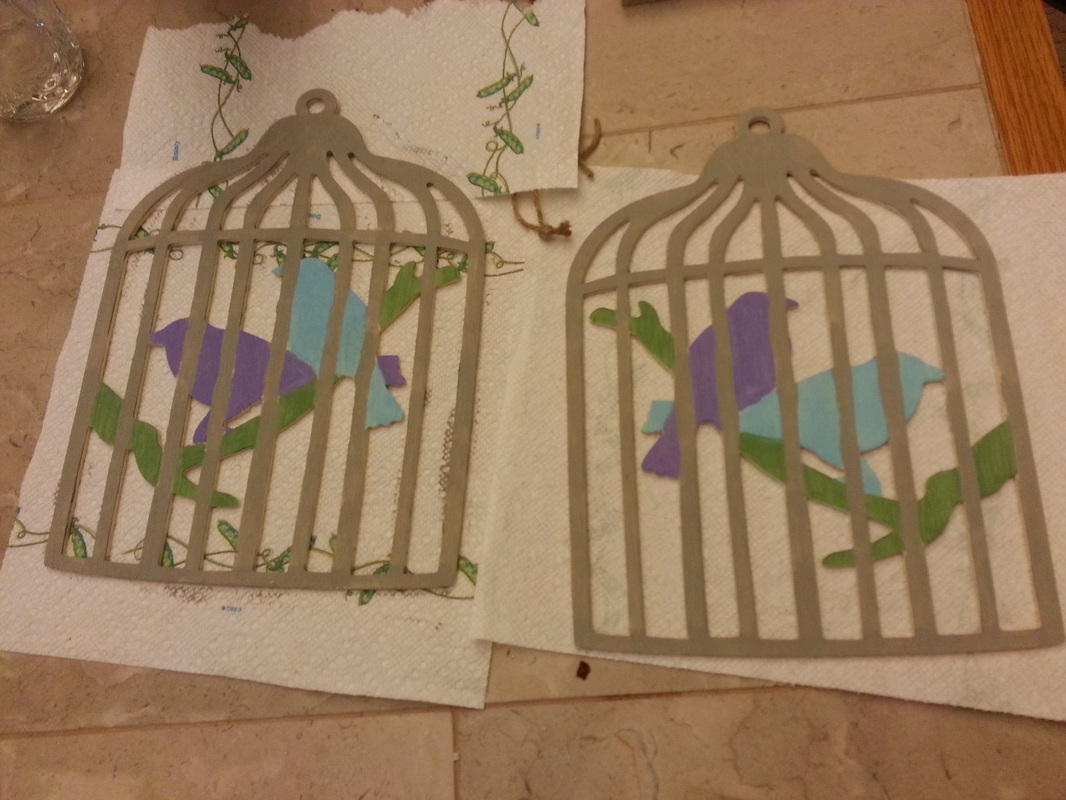
First I painted them. I kept it really simple because I am most definitely NOT an artist. I have very unsteady hands and no abilities to add shading, texturing or other fancy details. I flipped one of the birdcages so they would look different from each other and also switched which bird was which color. I think they came out fairly decent considering who was painting them, LOL.
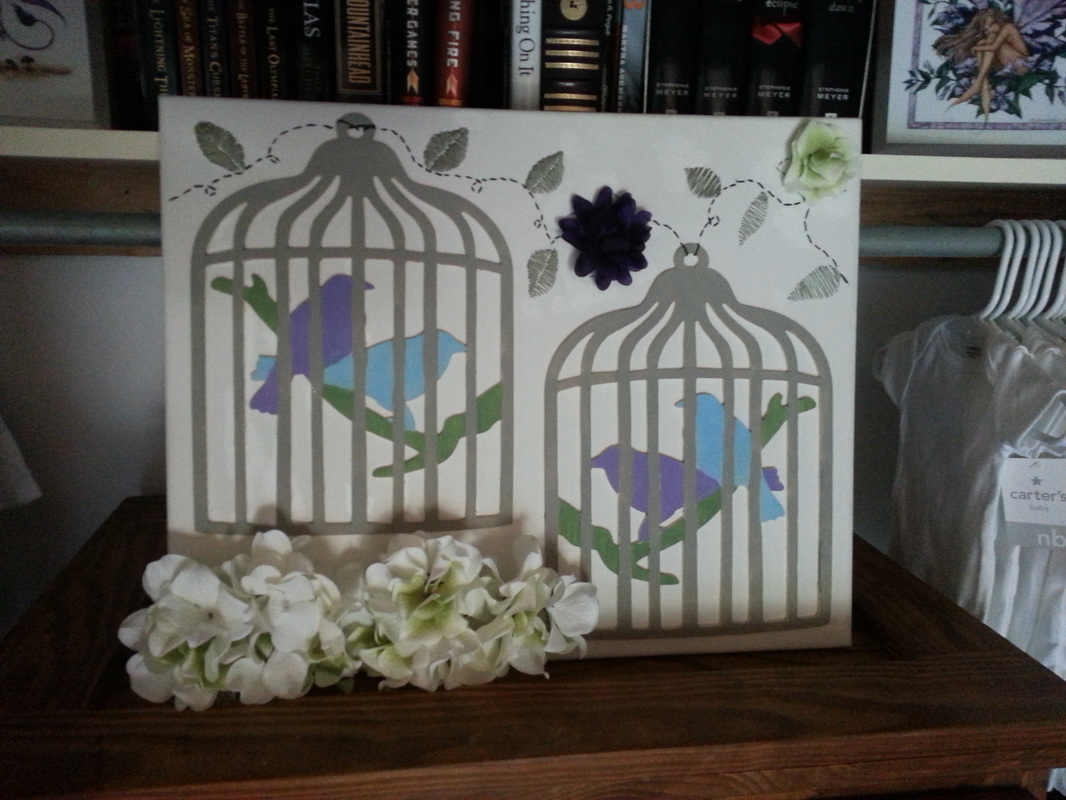
Then I used a little bit of wood glue and glued the wooden birdcages onto a white canvas (just bought the cheapest one I could find at Joann fabrics). I thought about trying to get another canvas at goodwill but I wanted the clean texture of a fresh, unpainted canvas instead.
Once I glued them on there, I kind of got stuck for a while and couldn't figure out what else I wanted to do with it. I tried to cut some "grass" out of felt to glue on the bottom but when I laid it against the canvas it looked hideous. So then I decided to use embroidery floss to hand stitch a vine and leaf design. I sketched it on the canvas lightly in pencil and then just traced it with the thread. Last thing I decided to do was to hot glue some fake flowers on the bottom just to give it a little more interest. I think it came out pretty cute!
So here's what my closet looked like before:
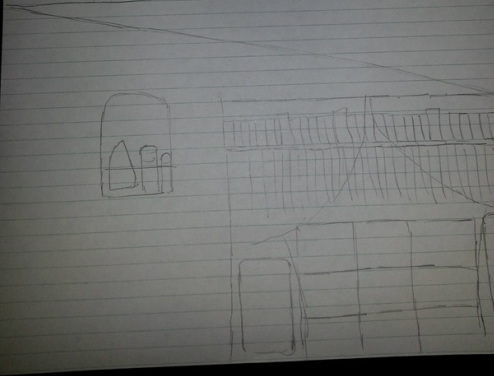
And here's the sketch of what I wanted it to look like.
And finally, after moving the plastic shelves and junk out, moving the dresser, books & onesies in, removing the closet doors and adding the birdie canvas...the closet area now looks like this:
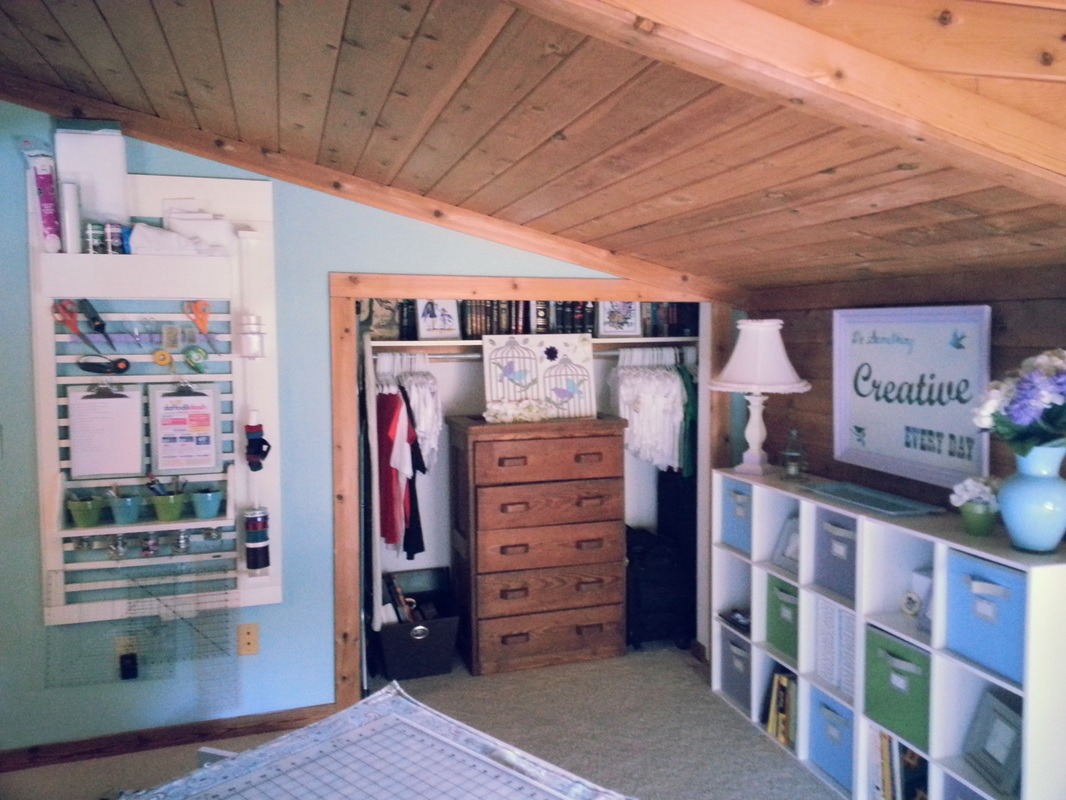
Yay for another really pretty (and even more functional than before) area of the quilt room! I am a bit of a stickler about having my stuff organized and when I can have things organized AND pretty, I just get so excited!!
Here's what the whole area looks like:
Here's what the whole area looks like:
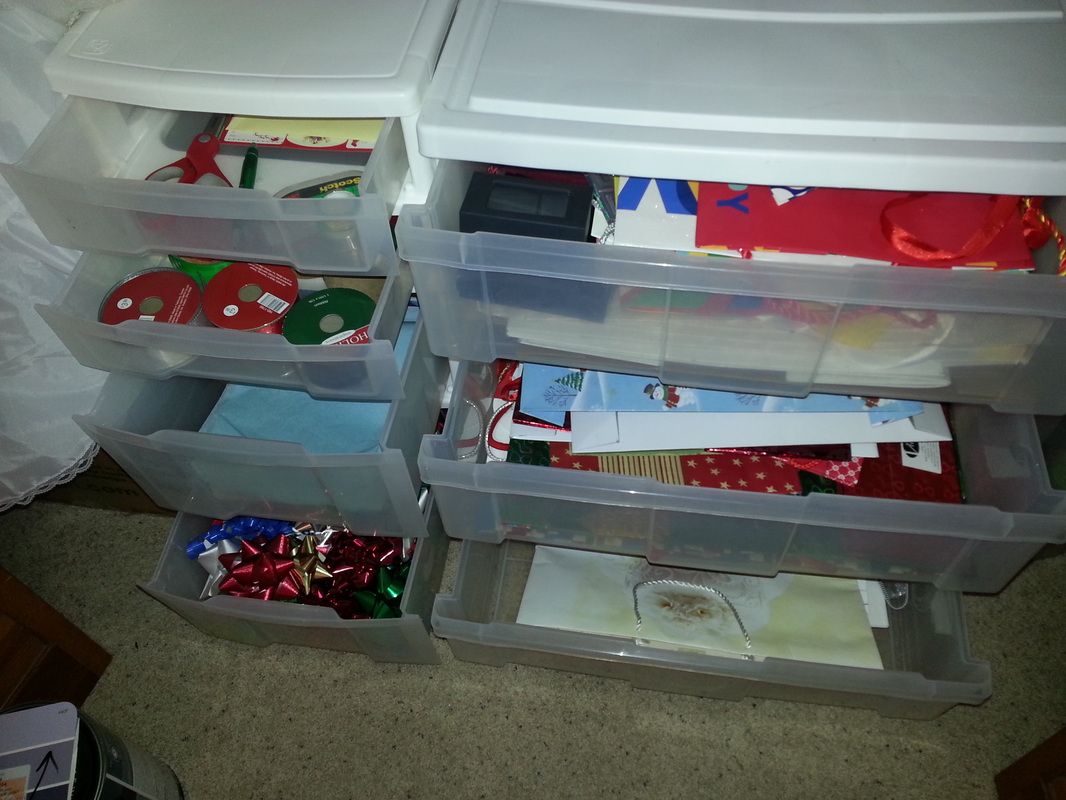
Are you wondering what I did with all those plastic drawer organizers? Well I moved them into the guest room closet. The wrapping paper and bows were overflowing and just a huge mess. Now that I put the drawers in there, the bags, bows, ribbons, boxes, etc are all organized (the wrapping paper rolls already had an organizer) so it's really easy to get what we need for gift wrapping! Yay for using what I already have to make two closets more functional!
Next up for the quilt room: Make and hang a "design wall" where I can hang up unfinished quilt blocks waiting to be sewn, hang my white birdie shelf and decide whether I want to recess my thread rack into the wall (this would take some serious effort though).


